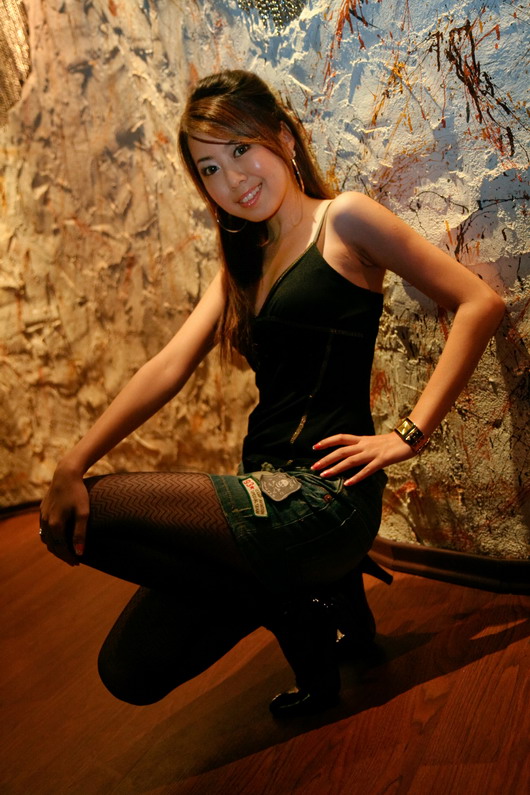
More often than not, I encounter pictures taken in very difficult lighting conditions that forced me to compromise. I recently took pictures of a bunch of models in a dark pub. Not an easy task I tell you. Flash was used extensively. And because my flash was not properly colour corrected, the colours of their faces came out really bad. ‘Nuf said, let’s see some pictures to prove this point:
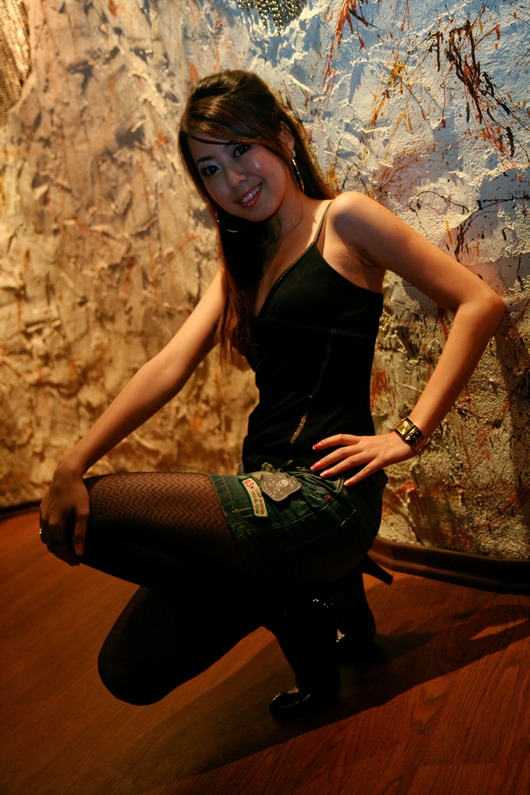
Bad isn’t it? The ambient lighting was warm, but the flash from my light is blueish white! And her face was badly under exposed! Urgh!!
I can always put it through the usual cycle of fixing exposure and white balance under Lightroom, but then the whole picture will be affected, and I don’t want that, because as you can see, the other places are ok. So I opted for Photoshop. Here I will document what are the steps that I took to overcome this problem. Please note that this is by no means the best method. I am just a newbie trying to solve my own problems. If someone has a better and simpler idea, do please share them with me.
Open the picture in Photoshop:
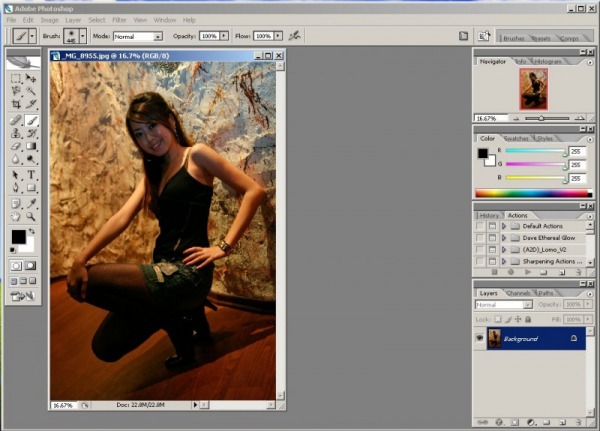
The picture looks dark doesn’t it? I am going to adjust the exposure first, because from experience, adjusting the exposure will normally skew the white balance a bit.
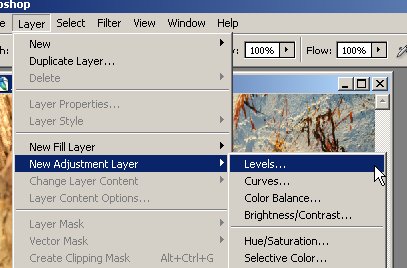
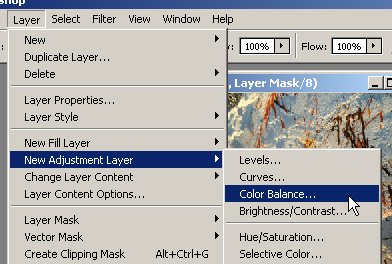
Go to layer – New Adjustment Layer – Levels…
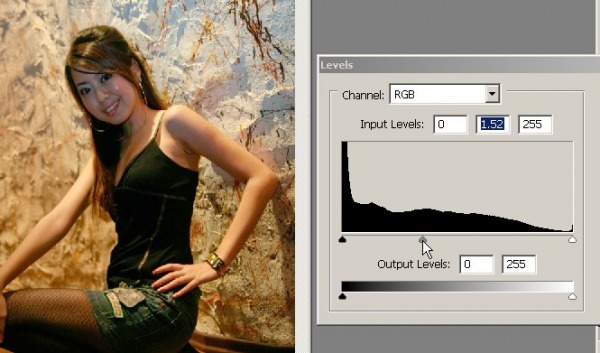
Adjust the middle arrow to the left. I think this corresponds to middle exposure. Don’t care lar… as long as it makes the face brighter. Experiment a bit with the other arrows and directions if you want.
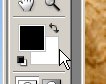
Tap on the “\” key. See the sign on the left of the tool box. The black square should change place with the white square. This is the whole point of this write-up, to show you what the whole deal is with the layer mask.
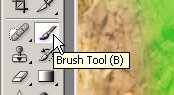
Select the brush tool.
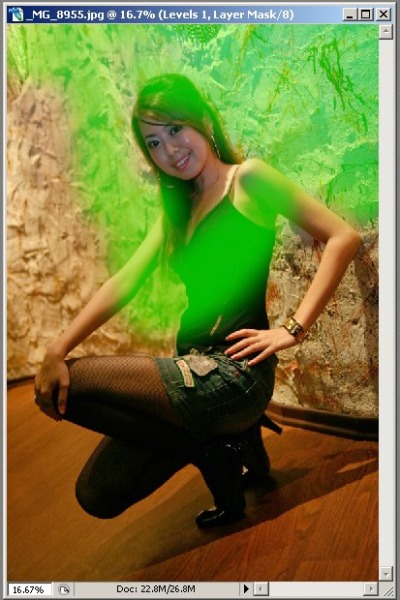
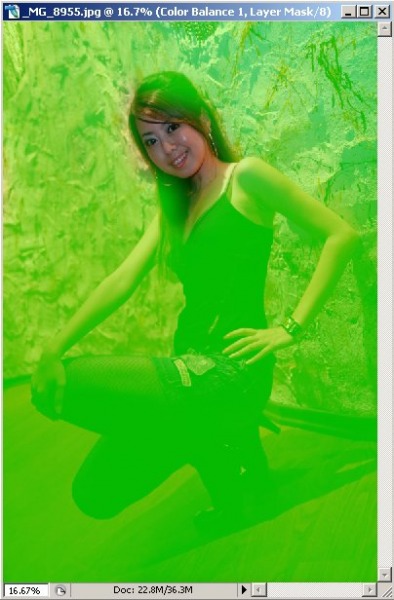
Here comes the interesting part. With your brush, paint over the areas outside of the area that you want to work on, in this case, the model’s face. Note that you might not get the same green colour that I have. The layer of “paint” that you apply here is called the mask.
If you have mistakenly painted over areas that you do not want to paint, you can do a few things:
- Cry like a baby and press Ctrl-Z, in which case you might also undo off portions that you wanted to keep. Very uncool method, IMHO.
- Be cool and press “\” one more time, and paint over the erroneous parts. You should see now that the white square has switched places with the black square again. But then you wouldn’t be able to see where you are painting over, because you have just turned off the mask preview by pressing the “\” key.
- A better option would be to use the eraser tool without pressing the “\” key. You get the see the mask layer, so you can see where you are deleting from.
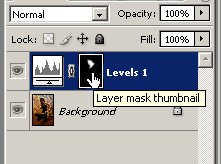
You might want to customize the colour of the mask to suit your picture. It’s a good idea to use a high contrasting colour to the overall picture that you are working on. To do that, double click on the layer mask thumbnail as below:
Select an appropriate colour for the mask.
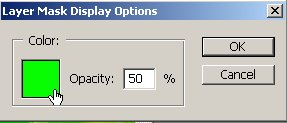
As you work on the mask, you might be able to see the thumbnail of the mask reflecting the colour of your paint. This is a good indication of which spots that you may have missed.
To confirm after you have finished doing all this, click on the “eye” icon next to the layer. You can now view the effect before and after your little tweak. Neat huh?
Here is the picture after this initial step. As you can see, her face has brightened up considerably.
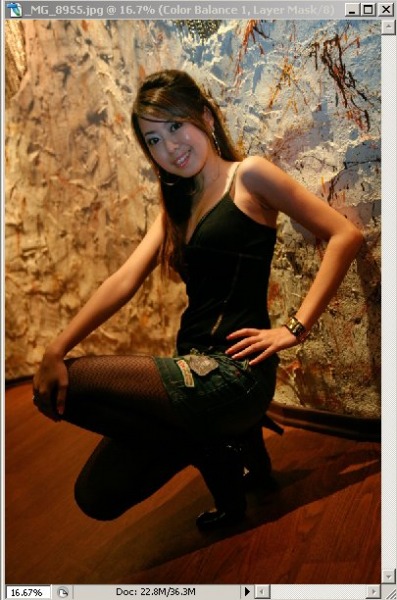
Although the brightness of her face has now been fixed, the white balance is still off.
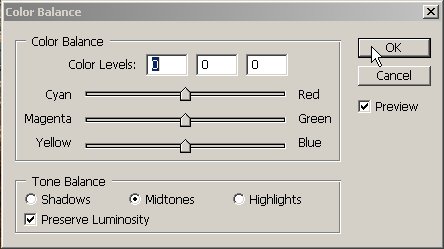
Now comes the next part, fixing the white balance. Go to Layer – New Adjustment Layer – Color Balance…
A dialogue box will be shown. Just accept everything at the moment.
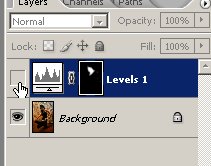
Again repeat the same step to paint over this new layer with the green mask. Here is how it looks like after completion:
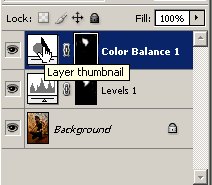
Now that you have determined the mask, double click on the layer, this time on the Layer Thumbnail (see illustration below)
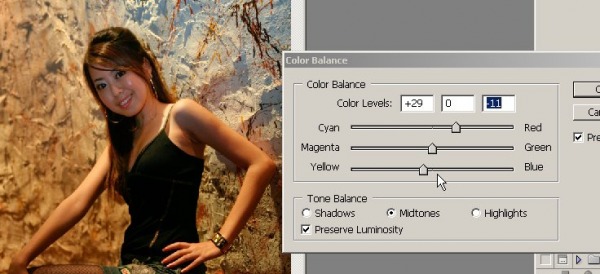
Adjust the colours to your heart’s content. The cool part is, when you drag the slider, you will notice that only the unmasked portion gets affected. Extra cool!
Now just sit back and enjoy the finished product! I learnt a new thing today!
Note to self: There are still some things that can be improved though. The lower body is kinda underexposed. I can apply more layers to brighten up that area, but this will introduce more steps for my process flow. After all, I am a lazy fella!
Happy experimenting!
Wow Whoa – must experiment with this already. -Ashlynne-
Why not colorgel-ed?
Good question Andy. At that time I have not acquired the coloured flash diffuser. Whenever I encounter situations like this, I normally just use the orange colour diffuser to match the tungsten lighting. Thanks for the suggestions!